Canon N3 Plug
This page describes my efforts in producing a home made canon n3 plug to connect to my EOS 10D.
If you decide to follow where I have been, you do so at your own risk. I simply don't want to know if you
damage your cammera.
I found that the price of the canon accessories (either the remote switch RS-80n3 or the remote timer
TC-80n3) that connect to this socket rather too expensive for what they were, and that a home made
soloution, whilst not better, would certainly be cheeper. ("Cheeper" does rather depend on your own
"cost per hour" of course :-)
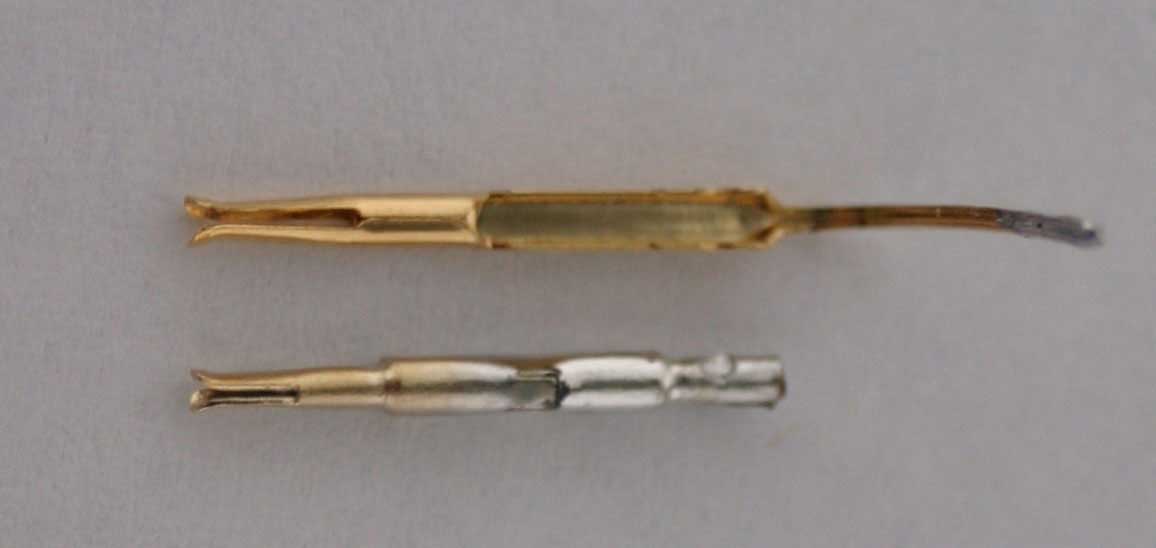
I found that the pitch of the n3 pins exactly matches that of a VGA socket and therefor have made
the connector from one of these. I took mine from an old ISA VGA card, but they are available from
the likes of RS, Farnell or Maplin in the UK, and other places elsewhere I expect. Unfortunately,
the recepicles in the VGA socket are not a very good fit to the n3 pins, though with care and a
little bending they can be made to work. I found that the recepicles from an old PS2 mouse socket
were almost exactly right (if not absolutely right) and so I have used these instead. Upper recepical
is from the VGA socket, lower one is from the PS2 mouse socket.
Start by dismanteling the VGA socket, and remove the pins.
Even if you are going to use the pins from the socket, it is best to remove them at this stage,
because you will have to sight through the holes to make sure of a good fit.
From now on, I will refer to the VGA socket as the new plug. From the shell of the socket,
cut enough material to make your new plug.
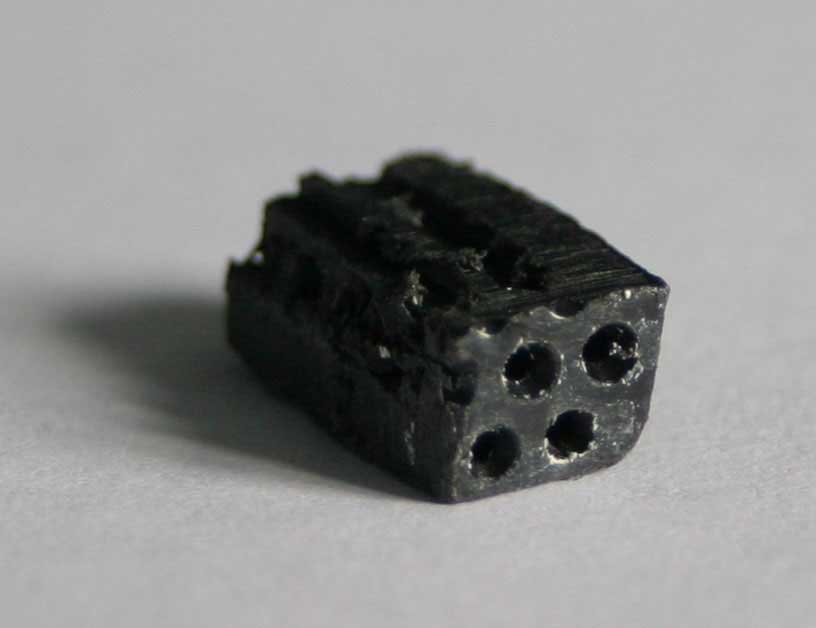
Continue to cut the new plug down, probably with a neadle file at this stage, such that with three
of the holes exactly lined up with the three n3 pins, it will fit into the n3 socket.
I have also added some araldite to the new plug to make up for any missing bits of plastic
(or my mistakes when filing :-)
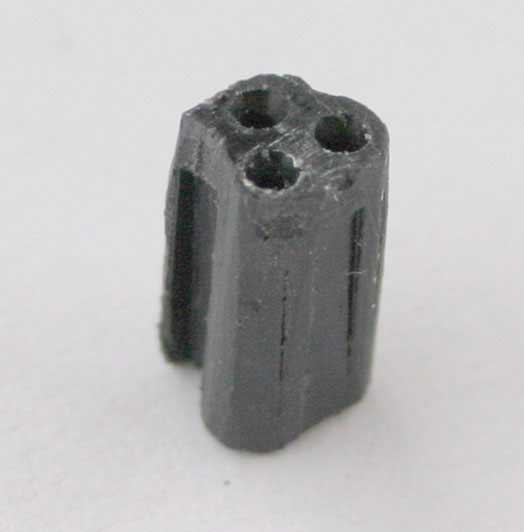
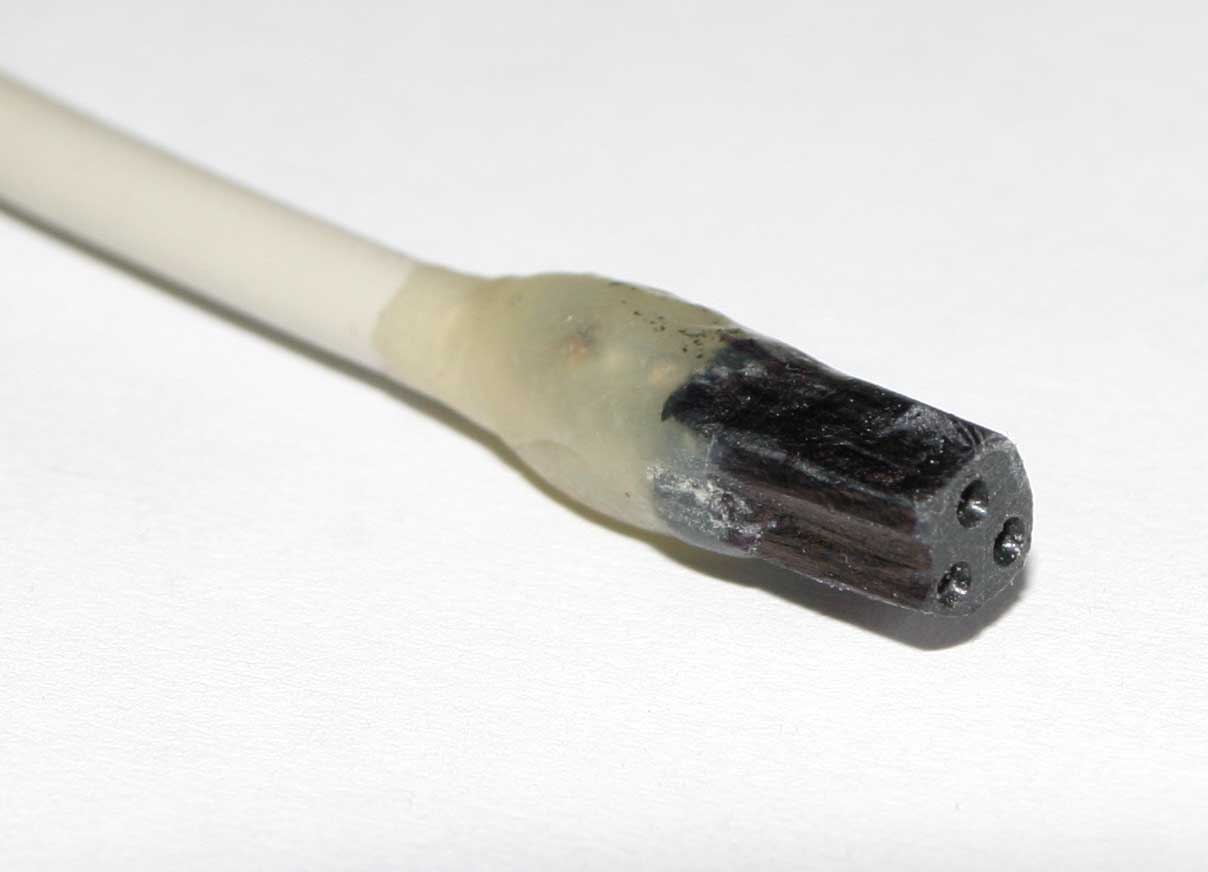
With some care and a small file, a very good fit can be produced. Now it's time to fit the pins
back in (or indeed to fit the pins from the PS2 mouse socket) and fix them in place
(I used more araldite) and then solder a thin 3 core cable (I used a scrap cable from an old PS2 mouse)
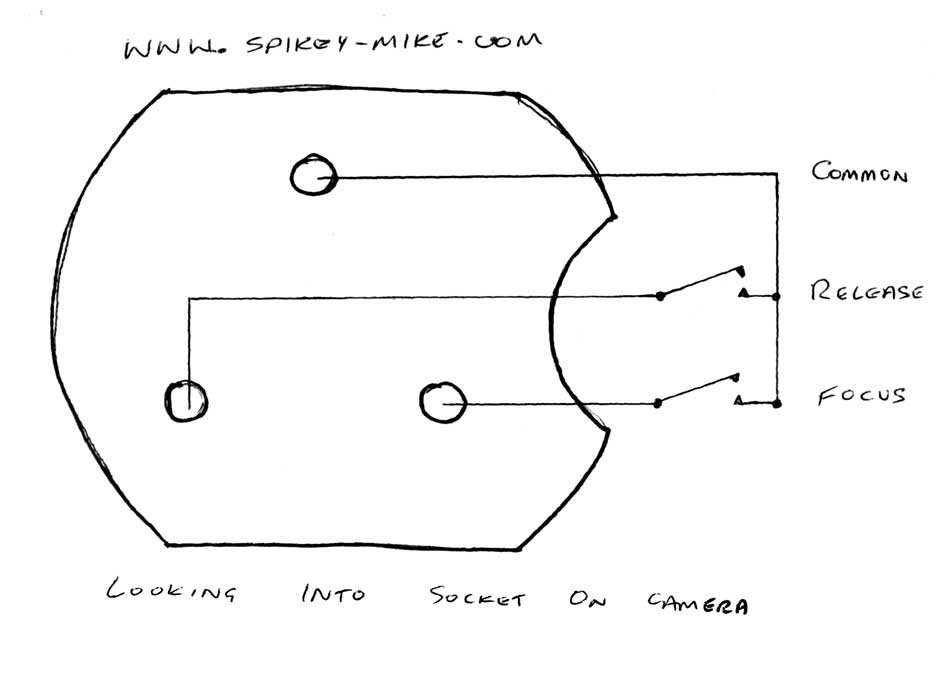
to the three pins and araldite the whole thing up like a moulded plug. This is a sketch of the n3 socket connections.
Quite a neat job I think, and although it doesn't latch in place, there should be sufficient friction to keep it there.
I have brought all three pins out on my plug because I intend to use the focus control separately
from the shutter (because it wakes the camera up from sleep with out taking a shot), but of course
you could merely connect to the two pins which fire the shutter.
Thanks to Óskar Páll (and others - use Google) for sharing his ideas.
I intend to make a remote release timer; not exactly a TC-80n3 copy
(I want it to be able to work with mirror lock up :-) and also be interfaceable to several
remote triggers (i.e. a motion detector and an RF remote control).
Update: Some info on the remote shutter release is HERE And wow!! it works!
Any further work on this project will be published here.
You are welcome to e-mail me with any comments if you like at mike at spikey-mike.com.
Home
